Browser auto-fill is more convenient with extensions. Compared to auto-type, they provide deeper and more convenient integration.
KeeWeb Connect is developed here: https://github.com/keeweb/keeweb-connect
The extension can be installed from the official stores, depending on your browser:
- Chrome
- Firefox
- Edge
- Safari
- Other browsers: how to set up
The main components of the extension are:
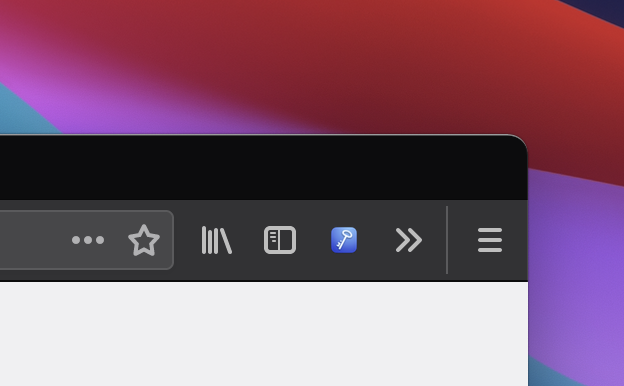
Extension button, provides one-click auto-fill and submit:
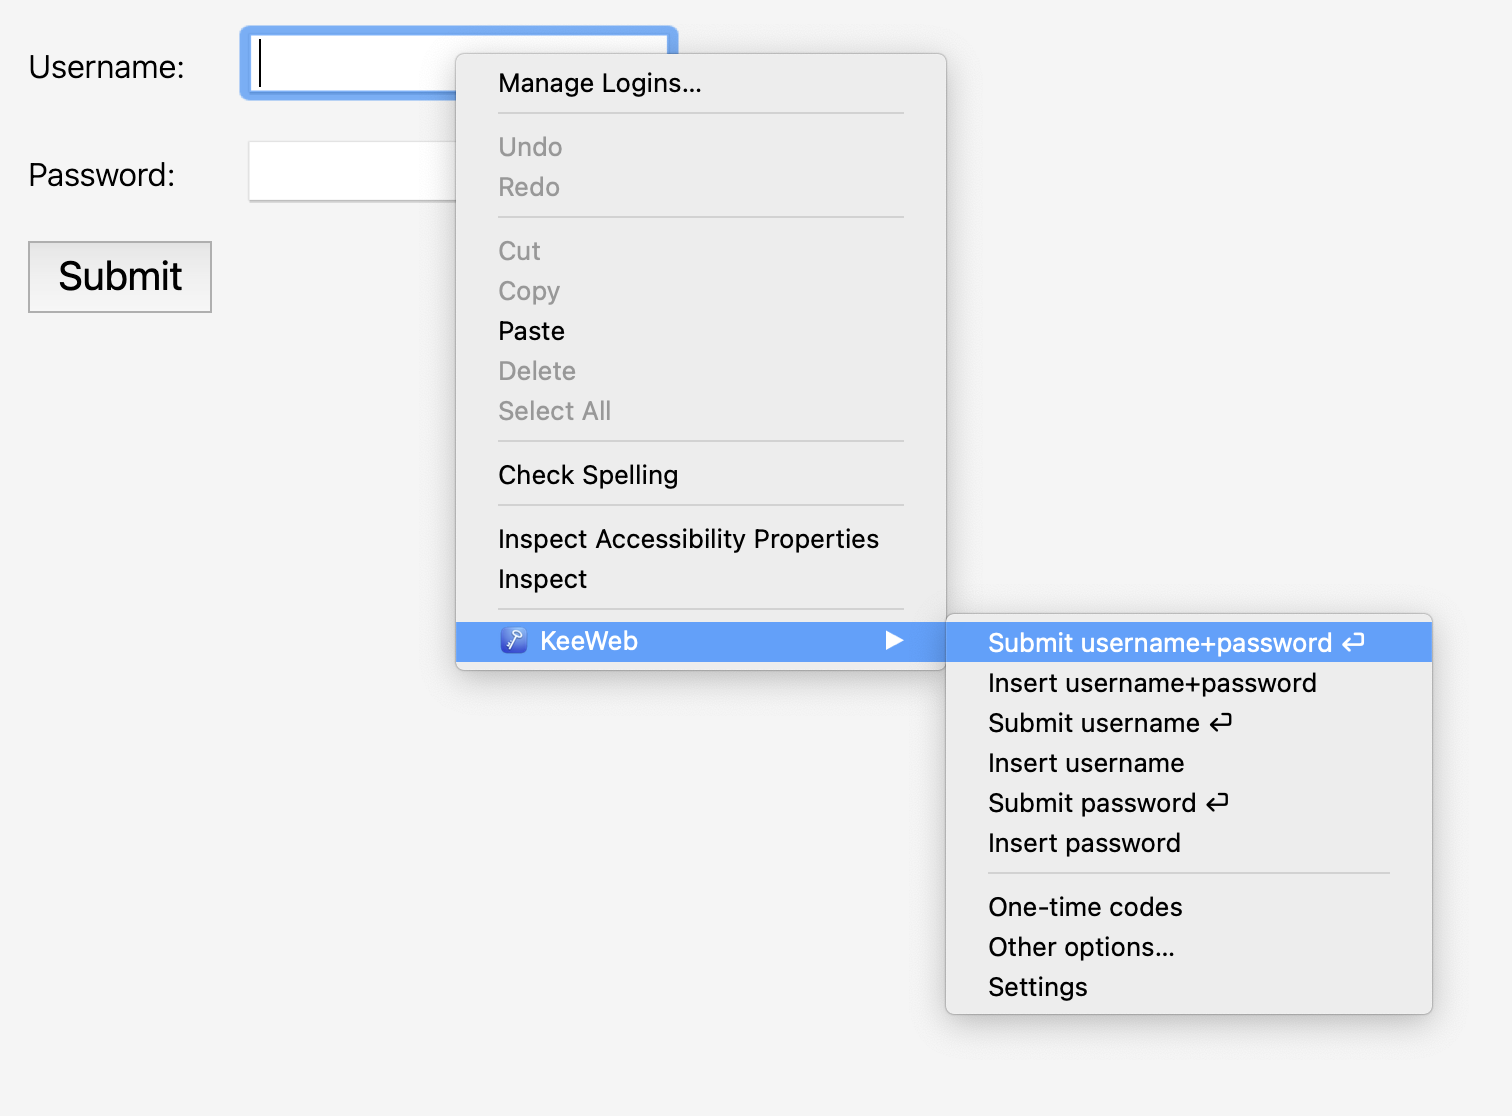
Extension menu, gives an option to choose the desired action:
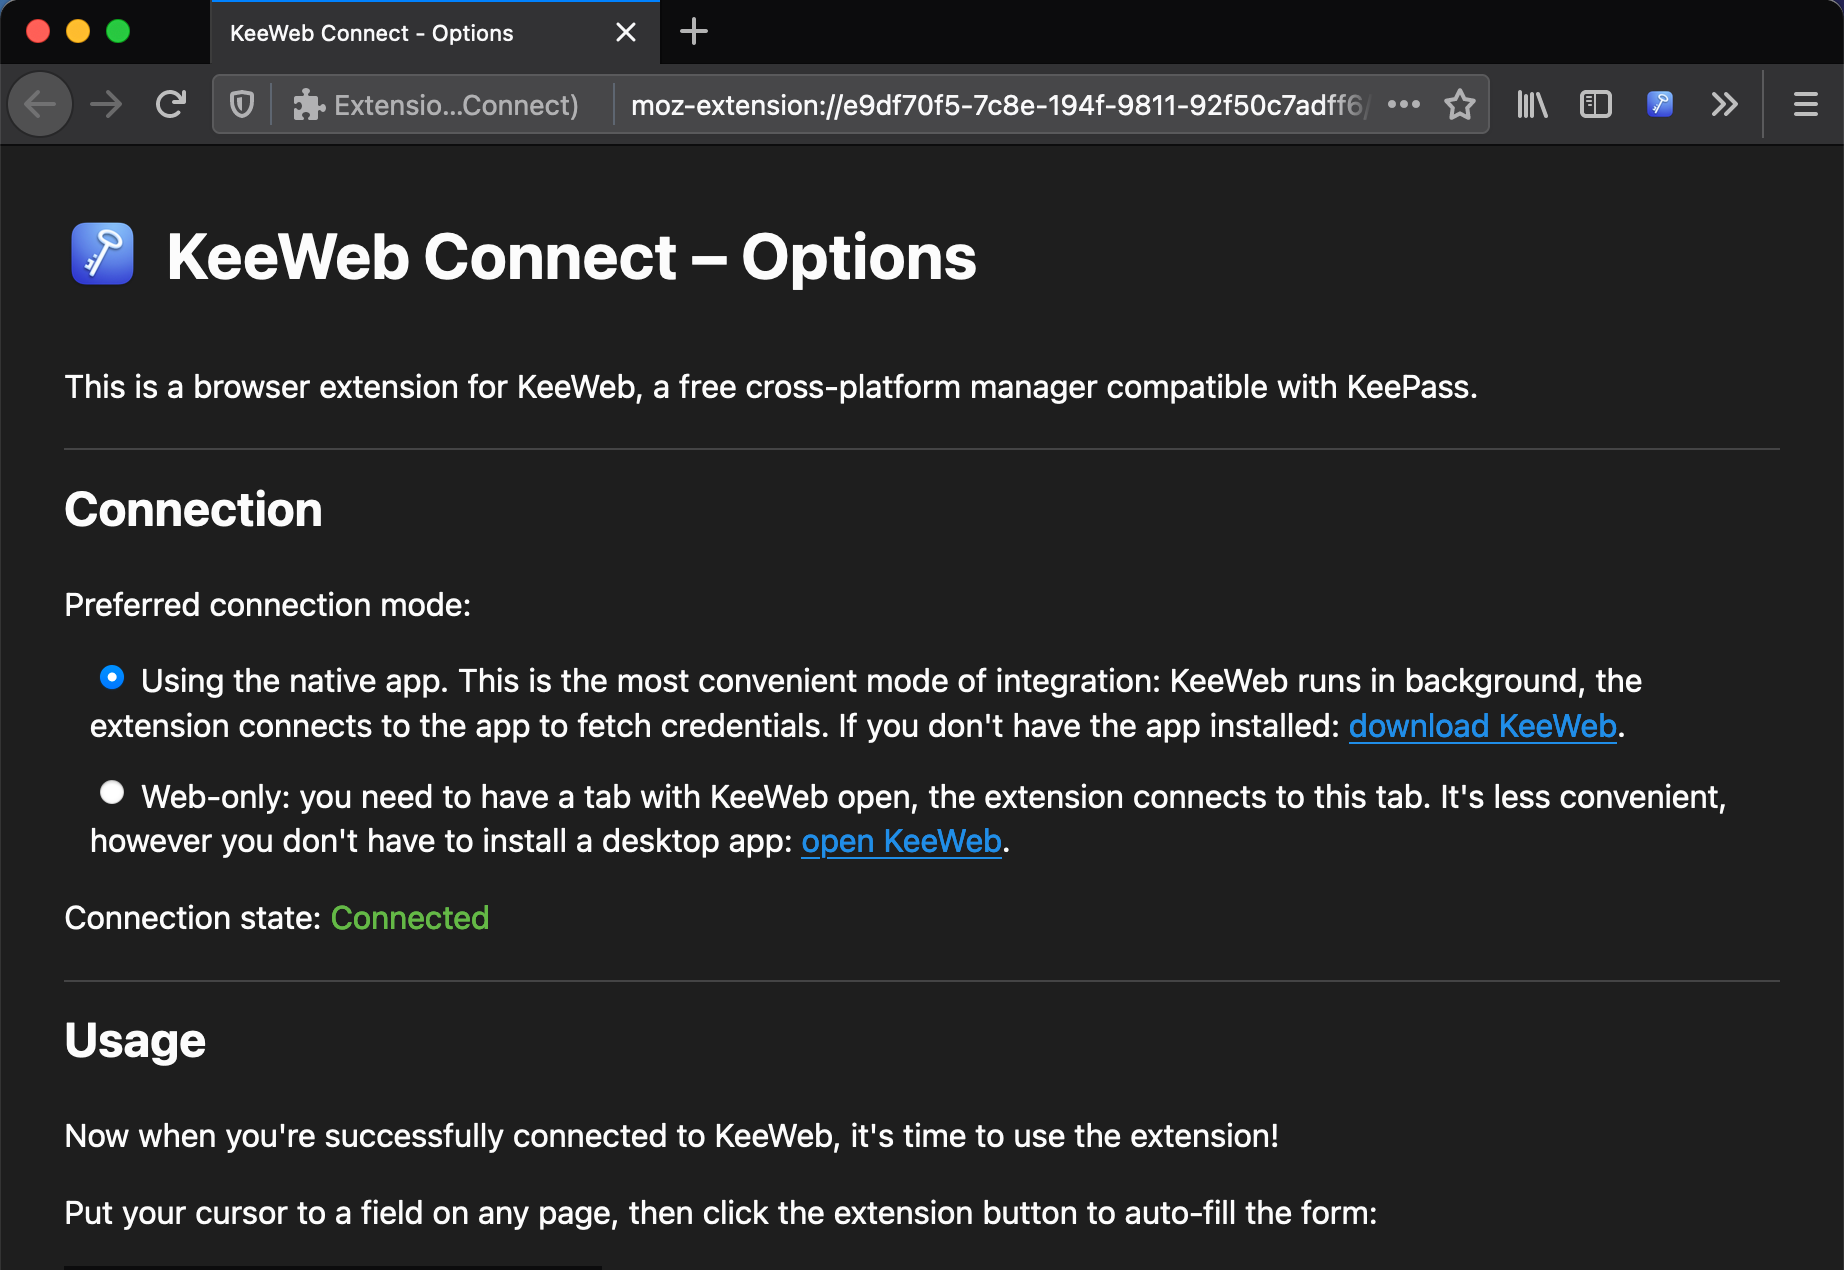
Extension settings page:
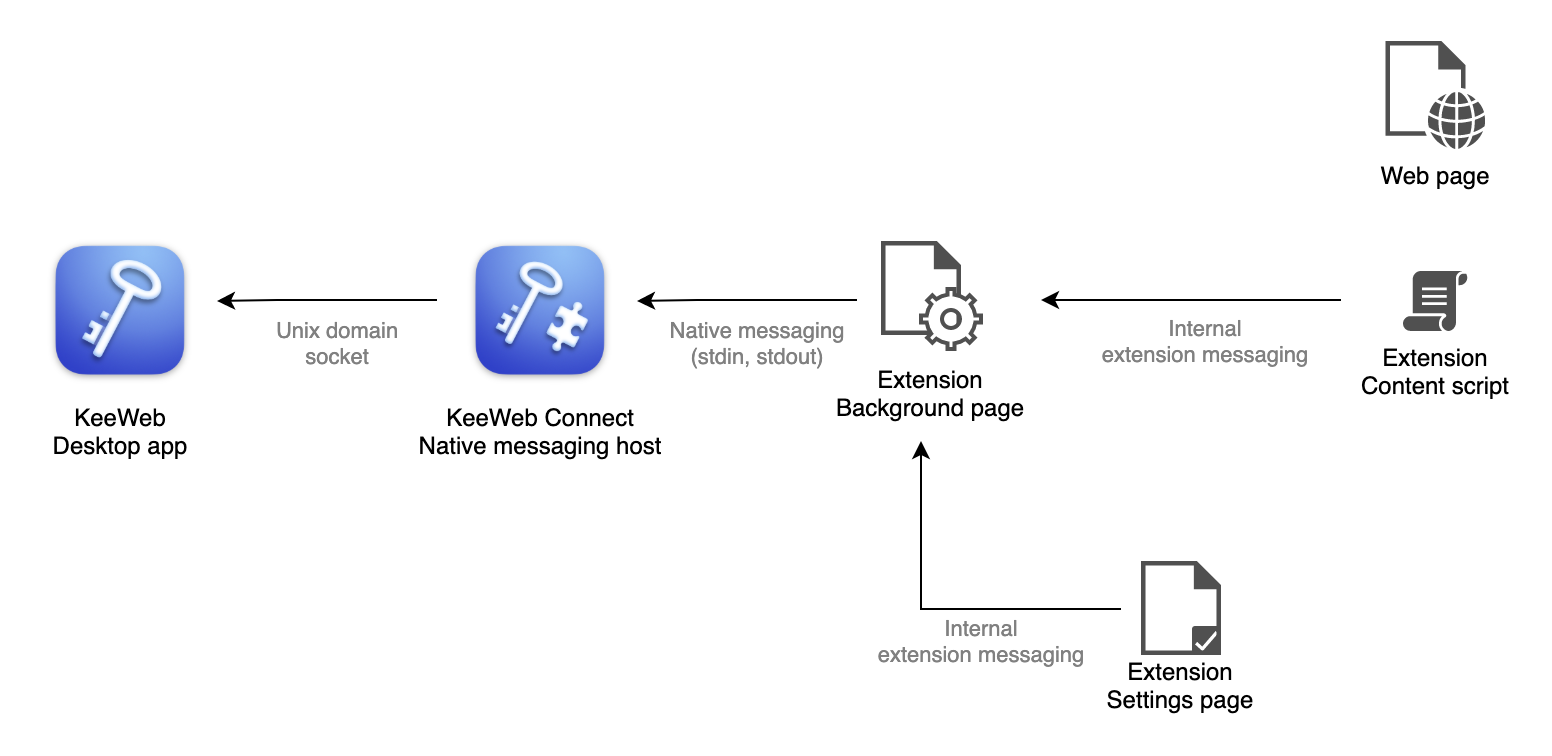
How it works
In one picture:
To be able to use the extension, enable the integration in KeeWeb settings:
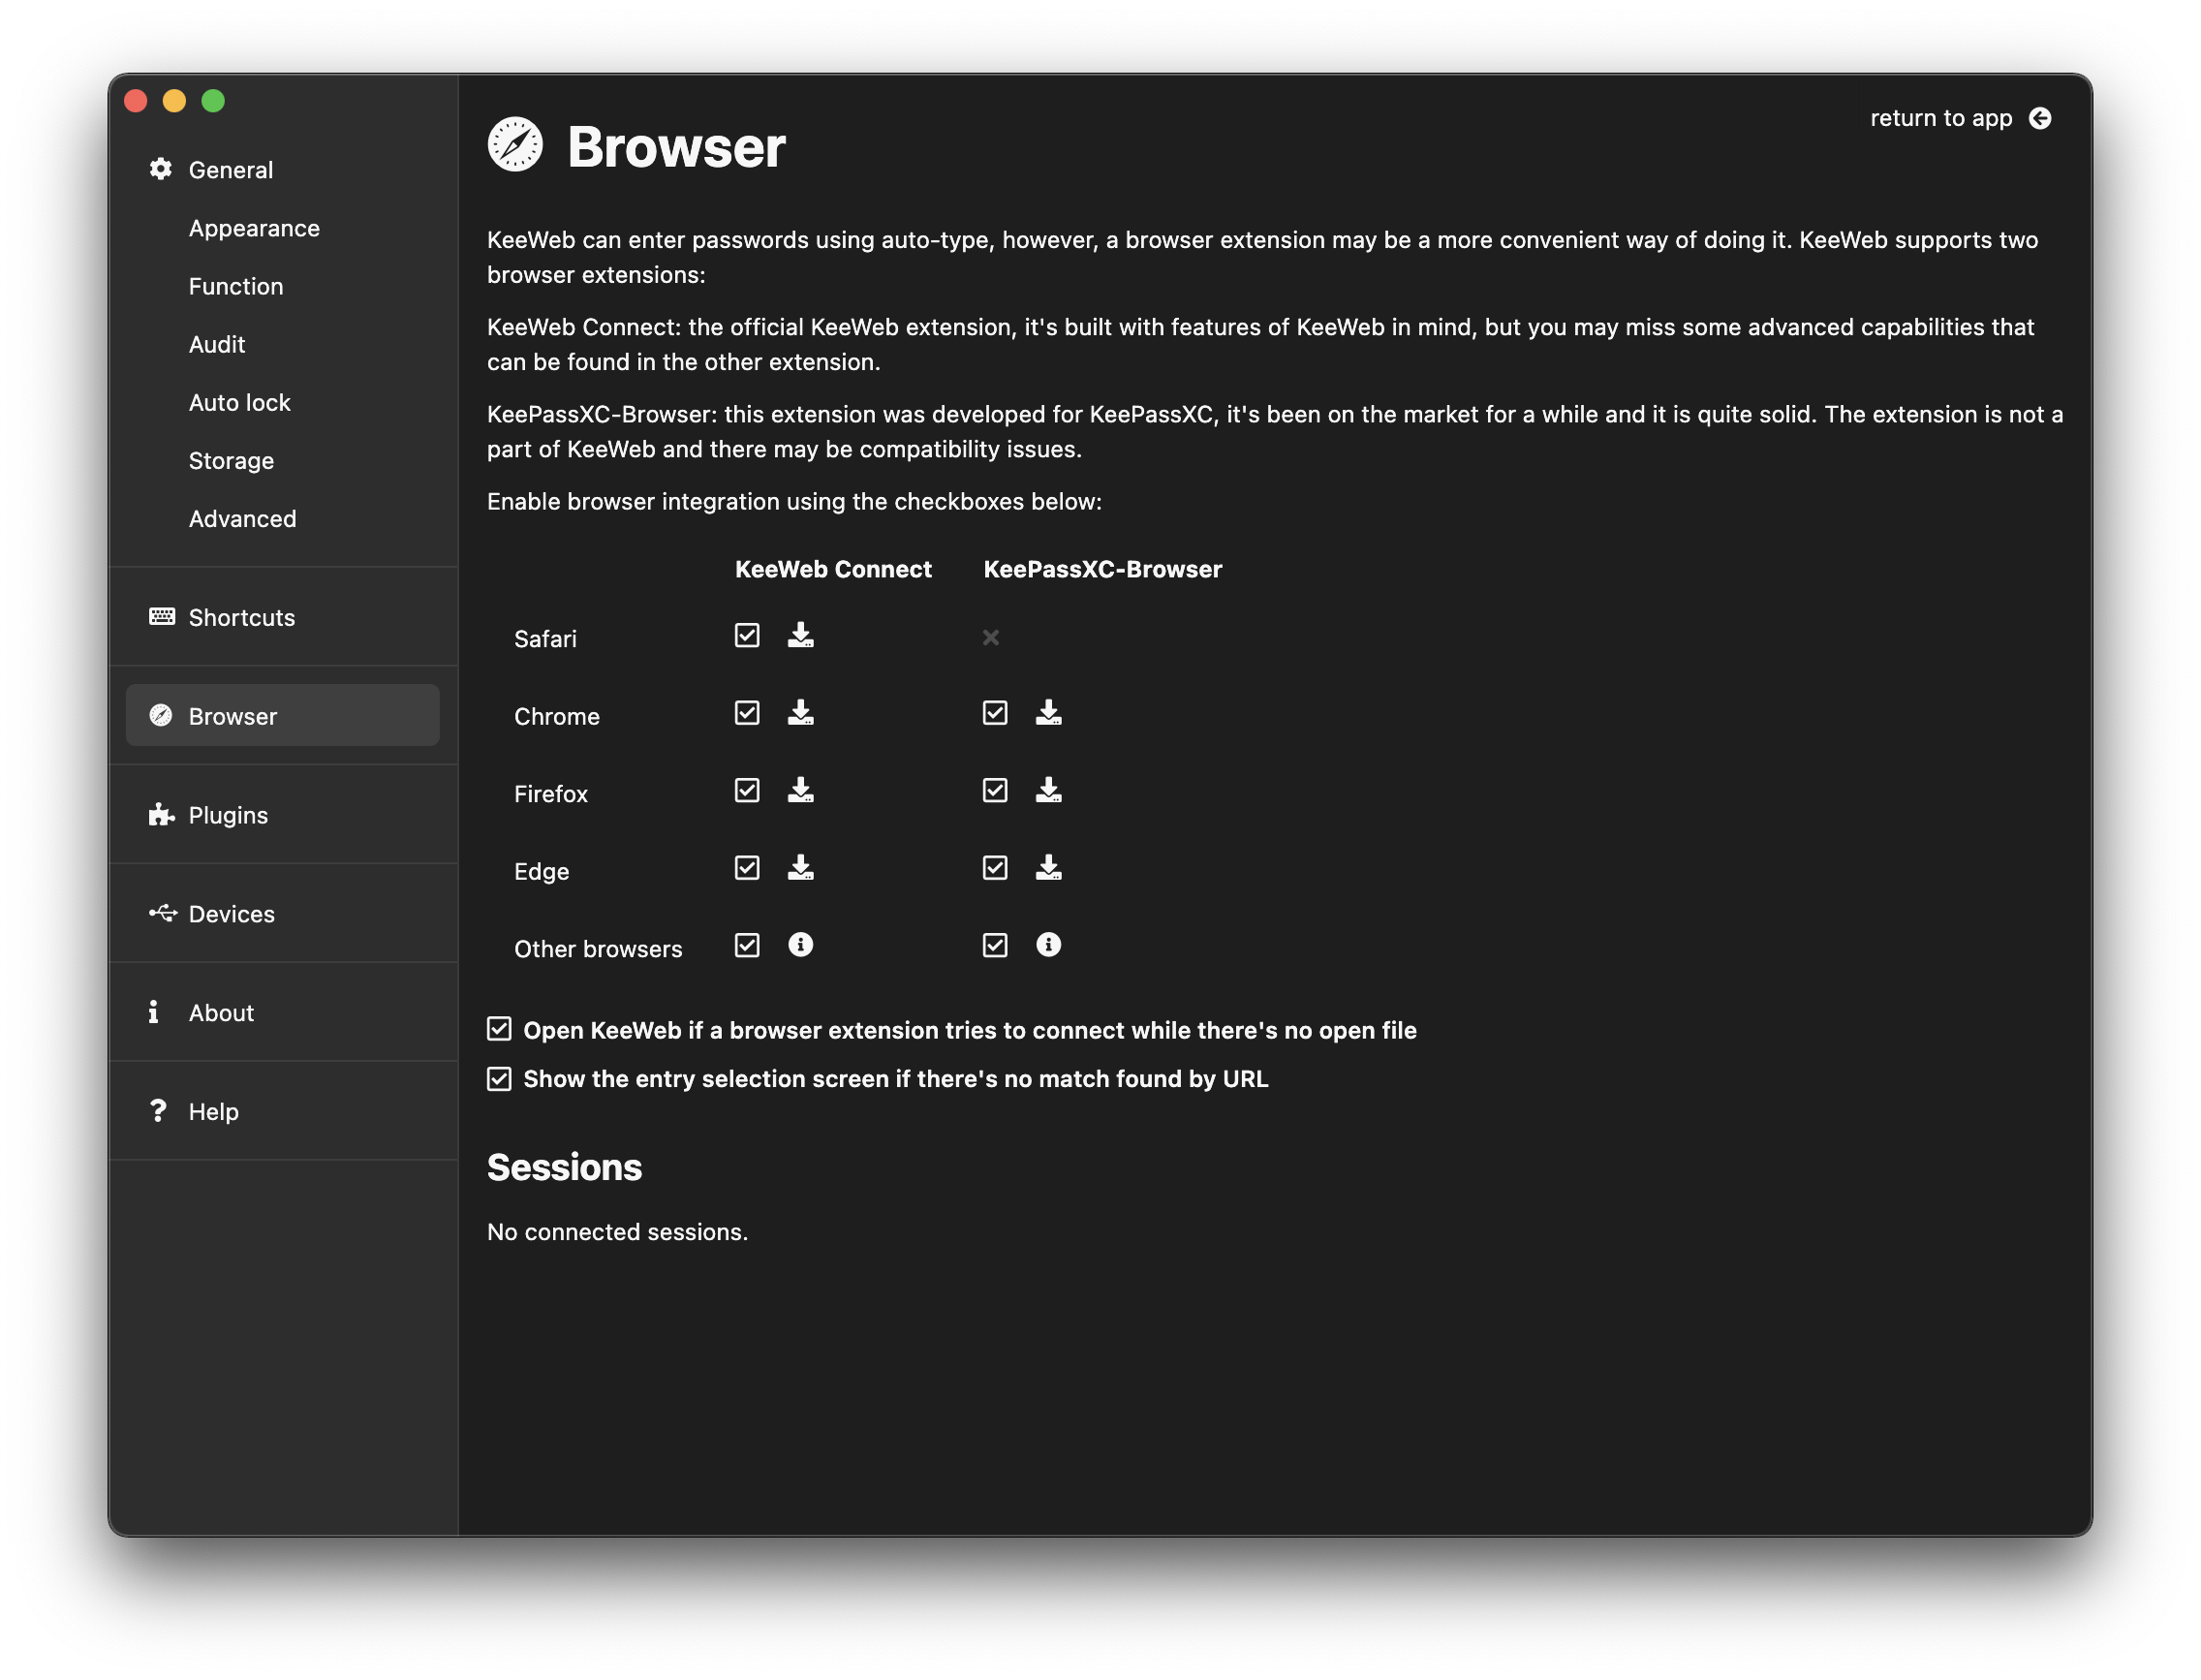
Other browsers
To use KeeWeb Connect in other browsers, first, you need the extension itself. Depending on your browser type, you can install it either from the Google Chrome Web Store, or from the Mozilla Firefox extension gallery. It's not possible to install from stores? You can also download the extension from GitHub releases.
Next thing you need to do is configuring connection with KeeWeb.
KeeWeb Connect exchanges data with KeeWeb using a secure communication technology called Native Messaging. While KeeWeb can automatically set up native messaging for popular browsers, it requires a bit of manual effort for others.
- Create a file called
net.antelle.keeweb.keeweb_connect.json(where? check in the manifest setup guides below:
For Chromium-based browsers (such as Vivaldi, Opera, Brave, ...):
{
    "allowed_origins": [
        "chrome-extension://pikpfmjfkekaeinceagbebpfkmkdlcjk/"
    ],
    "description": "KeeWeb native messaging host",
    "name": "net.antelle.keeweb.keeweb_connect",
    "type": "stdio",
    "path": "/path/to/keeweb/keeweb-native-messaging-host"
}
For browsers based on Firefox (you may also hear words "Mozilla" or "Gecko" about them):
{
    "allowed_extensions": [
        "keeweb-connect@keeweb.info"
    ],
    "description": "KeeWeb native messaging host",
    "name": "net.antelle.keeweb.keeweb_connect",
    "type": "stdio",
    "path": "/path/to/keeweb/keeweb-native-messaging-host"
}
Note the path property. Make sure the file exists there and is executable. On Windows add .exe and don't forget about double slashes, for example, it can be something like:
"path": "C:\\Program Files\\KeeWeb\\keeweb-native-messaging-host.exe"
On macOS it will be inside the app bundle, for example:
"path": "/Applications/KeeWeb.app/Contents/MacOS/util/keeweb-native-messaging-host"
On Linux the installation path depends on the distribution you used, for example it can be:
"path": "/usr/share/keeweb-desktop/keeweb-native-messaging-host"
-
For Windows: add a registry key as described in the guide below
-
Some browsers may need a restart
-
Still doesn't work? Open the extensions page and inspect the "background page" of the extension, the Console tab there can give a clue
Native messaging manifest setup guides
KeePassXC-Browser
KeeWeb supports KeePassXC-Browser, however, there may be integration issues. The installation is intentionally made hard and you're encouraged to use our own extension instead.
❗️ If you still decide to use KeePassXC-Browser with KeeWeb, please note: all issues you will face must be reported to the KeeWeb bugtracker, not to KeePassXC.
Installation:
- Install the browser extension itself
- Connect it to KeePassXC, this will create a native manifest
- Find that manifest as it's described above and replace the proxy path with
keeweb-native-messaging-hostwith its corresponding path